Verify and Update Your Device
University Windows devices must run on Windows 11 before Microsoft discontinues Windows 10 support on Oct. 14, 2025. Devices that are not updated are a security risk and can be disconnected from the network after support ends.
Beginning Oct. 14, 2025, devices that are running Windows 10 will be quarantined from the UTA network.
If you know your device needs to be upgraded or replaced, please complete this form and an OIT employee will contact you.
To learn how to verify your operating system, request a device upgrade or view your departmental contact, follow the below steps:
Step 1: Verify if your device needs an upgrade
Follow these steps to know if your device is running Windows 10 and will need an upgrade:
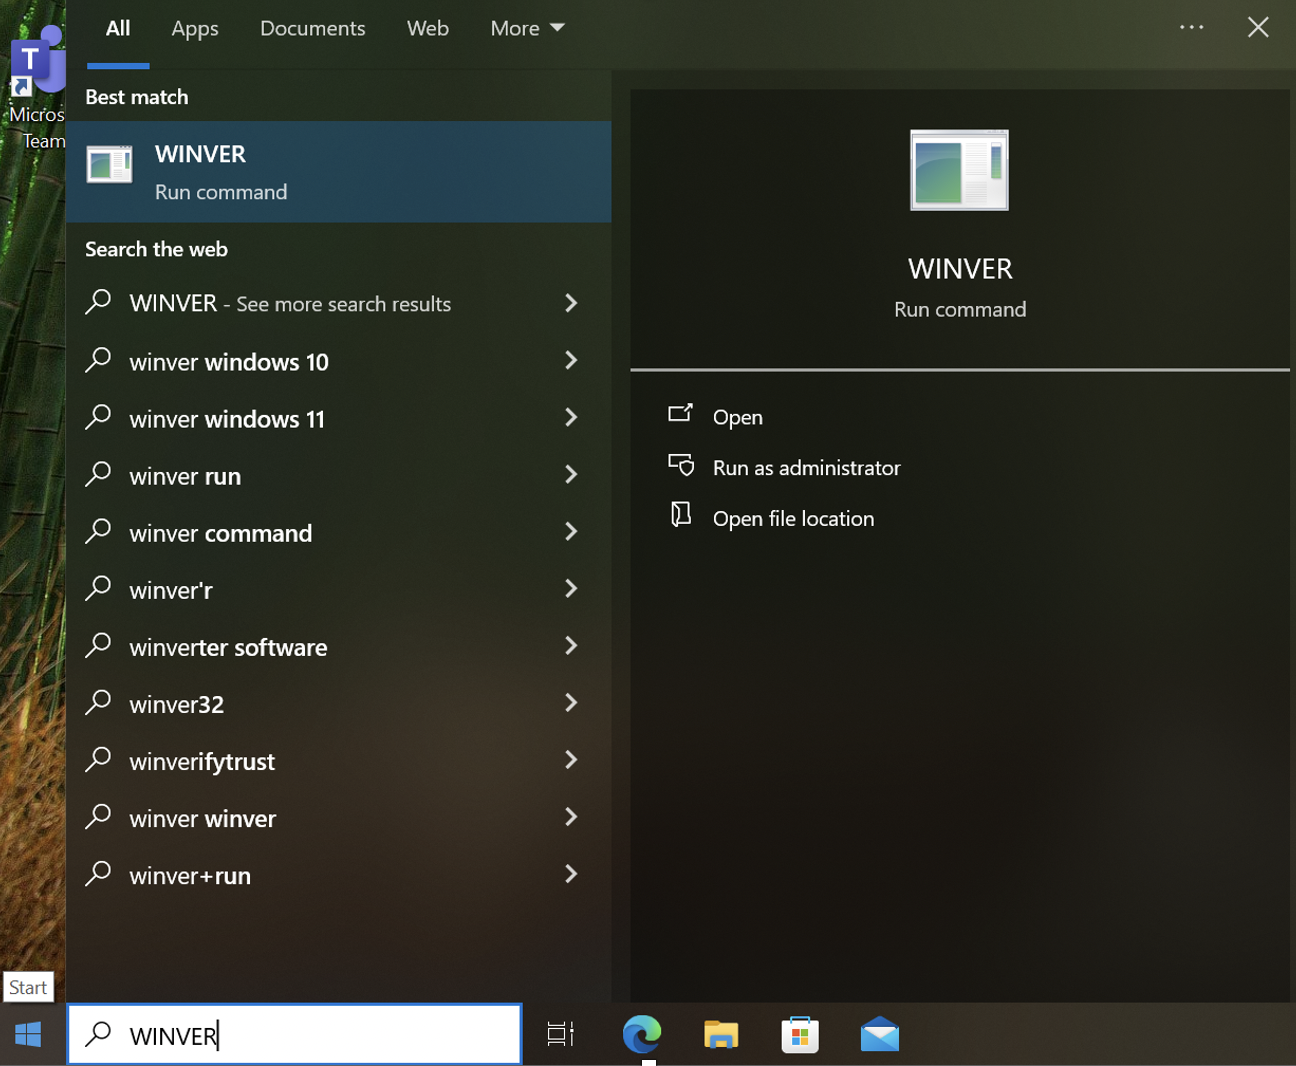
- Click on the Start button (the Windows icon) in the bottom-left corner of your screen.
- Type "winver" in the search box and press Enter.

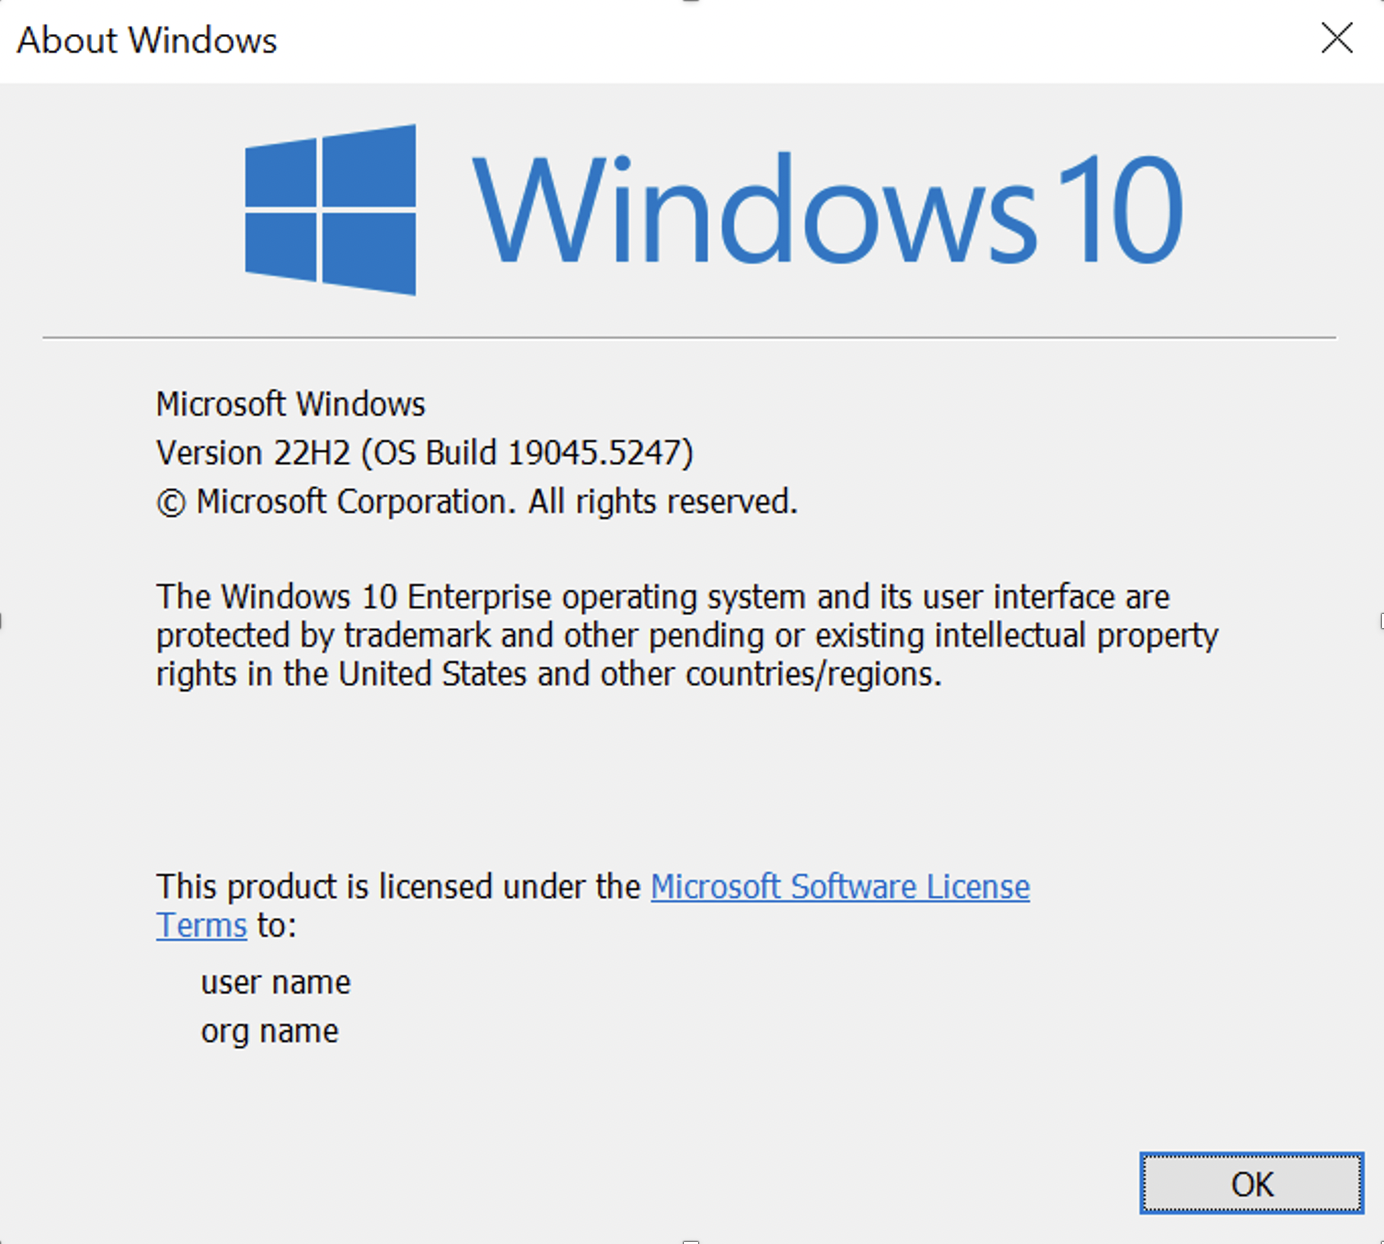
- A window will pop up with information about your operating system. Look at the top of the window. Under "About Windows” should display Windows 10 or Windows 11.

- If the information says “Windows 10,” your device needs to be upgraded.
Step 2: Prepare for the Windows 11 upgrade
To ensure the upgrade goes smoothly, back up your important files and apps. Visit these links for more information on file storage:
- How to back up your documents, desktop, and pictures folders to OneDrive
- How to upload your files and folders to OneDrive using the web version
- Export/Import Bookmarks (Edge, Firefox, Chrome)
- How do I copy J: Drive to OneDrive?
- Verify Files and Folders Have Been Uploaded to OneDrive
- How do I upload other files and folders to OneDrive?
Step 3: Initiate the update
Follow these steps to update your device:
- Confirm with OIT that your device is ready for an upgrade by submitting an Upgrade Operating System Request.
- When you meet with the OIT technician, you will select one of two update methods:
a. Completing the update through the regular Windows update feature.
b. An OIT technician will complete the upgrade for you.
Need help?
Due to outdated hardware or space requirements, some computers may not be compatible with Windows 11. If you experience trouble upgrading your device, contact your Distributed Support Associate (DSA). To learn who your DSA is, visit this KB article. If a DSA is not listed for your department, contact the IT Service Desk by chat or submit a ticket at ithelp.uta.edu.
We understand that there might be special situations where device replacement is not an option. Please submit a Security Exception Request for The Information Security Office (ISO) to review your scenario and device.


